
Understanding & Setup: How to Pitch an Air Tent for Easy Camping
Air tents have changed the way people camp, offering a simple setup that gets you out of the car and into your pitch quickly. This guide explains how air tents work and provides practical advice for pitching, maintaining, and packing them away.
Contents
Air Tent vs. Pole Tent – A Comparison
Deflating and Packing an Air Tent
Troubleshooting Common Air Tent Issues
What is an Air Tent?
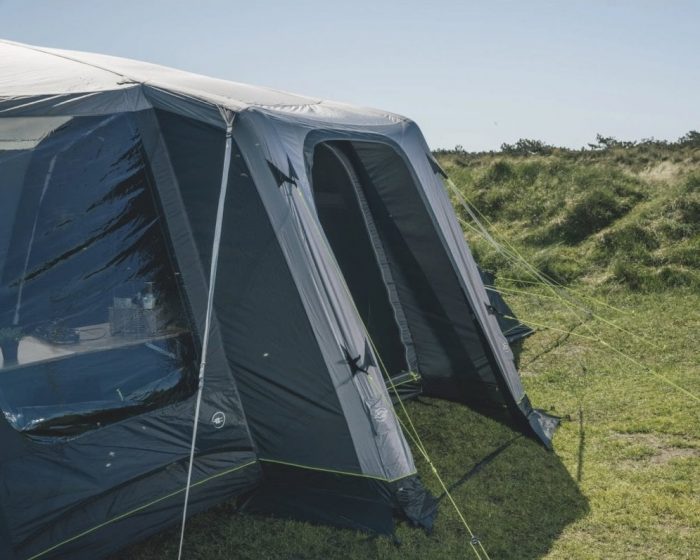
An air tent uses inflatable beams instead of rigid metal or fibreglass poles. The tent’s structure is supported by these beams, which are inflated using either a hand pump or an electric pump. The outer fabric, reinforced by the inflated beams, gives the tent its final shape and stability.
Air Tent vs. Pole Tent – A Comparison
The decision between an air tent and a pole tent often comes down to balancing setup time, weight, and cost.
| Air Tents | Poled Tents |
|---|---|
| The benefits of air tents – Speed of setup. – Large family tents can be pitched in minutes. – Stable in windy conditions, as the flexible beams can flex to withstand gusts without the risk of snapping. – Easier to pitch on your own. | The benefits of poled tents – Pole tents are generally lighter and pack down smaller, making them easier to carry for hikers or those with limited boot space. – They are also usually cheaper to buy and replace if needed. – Poles are lightweight. |
| Downsides of air tents – Air tents are typically heavier and have a larger pack size. – You also need a pump, which is an extra piece of equipment to carry. | The downsides of poled tents – Setup can be time-consuming, especially with larger tents that require threading multiple poles through sleeves. – Poles can also snap or get lost. – Poles can break accidentally in strong winds. |
How to Put Up an Air Tent
The process is designed to be straightforward and can be completed by one person. Always ensure you have all components of the tent and the pump before leaving the house.

1. Prepare
A good pitch starts before you even get the tent out of the bag.
- Choose your spot: Look for a clean, dry, and level area. Avoid pitching your tent in low-lying areas or on top of puddles, as this can cause water to pool under the tent.
- Lay the footprint: If you have a tent footprint, lay it down in your chosen location first. This helps protect the tent’s built-in groundsheet from dirt and damage.
- Get everything ready: Take the tent out of its bag. Keep the pegs and pump nearby so they are easily accessible when needed. Keep the tent bag close and put a weight inside it to stop it from blowing away.
2. Pitch the air tent
Now you’re ready to get the tent standing.
- Unroll the tent: Lay the tent out on top of the footprint. Make sure the tent’s sewn-in groundsheet completely covers the footprint.
- Peg the corners: Secure the four corners of the groundsheet to the ground.
- Inflate the beams: Attach your pump to the inflation valve. It’s often a good idea to open a side door to release any vacuum. Begin inflating from a middle beam and work your way outwards. Inflate the beams to the recommended PSI, usually around 6PSI.
- Lift the tent: After you have inflated the first one or two beams, go inside the tent and lift the structure off the ground. This helps the beams find their correct shape.
- Final inflation: Finish inflating the remaining air beams.
3. Secure the tent
With the tent standing, the final stage is to secure it properly.
- Close all doors: Zip up all entry points into the tent. This ensures that when you peg the tent, you don’t put too much tension on the zippers, which could cause them to fail.
- Peg the tent: Starting from the rear, begin pegging the tent into place. Make sure each peg is placed outward in the direction the pegging point is facing.
- Peg the front: If your tent has a front enclosed porch, peg the middle pegging point first, then work outwards, pegging the left and right sides. It helps to have a partner pull the other side to get a nice, even tension at the front.
- Secure the guy lines: Finally, peg out all the guy lines and storm straps. They should be pegged in the direction they are facing. Never over-tension them; Guylines are there to support the tent, but never pull on the tent. If they are over-tightened, this can distort the beams, shape and stability.
- Final checks: Check that all the inner doors open and close easily. Store the tent bag and any spare parts safely in your car.

Deflating and Packing an Air Tent
- Release the Air: Open all the deflation valves to let the air escape from the beams.
- Fold the Tent: Once fully deflated, fold the tent lengthways to the width of the carry bag.
- Roll it Up: Starting from the end opposite the deflation valves, roll the tent up tightly. This will push any remaining air out of the beams and help you achieve a compact size.
- Place in the Bag: Use the included straps to secure the rolled tent before placing it in the bag.
- If you pack the tent away wet at the end of your camp, make sure to take it out to dry as soon as you return home. Never store a tent wet under any circumstances—ensure it is completely dry inside and out before repacking, including around the bedrooms and in the corners.
Storing the tent
Store your tent fully dry in a cool, clean location, away from damp, cold, and rodents.
Troubleshooting Common Air Tent Issues
Problem: The tent is leaning or not holding its shape.
Solution:
- Check the pump’s pressure gauge and ensure the beams are inflated to the recommended pressure.
- Check that your guylines are not pulling on the tent.
- Check that your sides up and down are in line with each other.
Problem: A beam has a slow leak.
Solution: Locate the source of the leak by running a soapy water solution over the beam; it will bubble at the puncture site. If included, use a repair kit to patch the puncture, or try using some form of strong tape to get you through your trip.. If a major repair is needed, the inner tube can often be replaced.
Air Tent Care and Storage
To ensure the longevity of your tent, make sure it is completely dry before packing it away. Storing a damp tent will lead to mildew, which can damage the fabric. Store the tent in a cool, dry place away from direct sunlight.
Key Takeaways
- Easy Pitching Process: Setting up an air tent is a simple three-step process: prepare your pitch, inflate the tent’s beams, and secure it with pegs and guy lines.
- Fast Setup: Air tents use inflatable beams instead of rigid poles, allowing for a much quicker and easier pitching process, often manageable by a single person.
- Durability and Stability: The flexible nature of air beams makes them highly stable in windy conditions, as they can bend without snapping, unlike traditional poles.
- Portability Trade-off: While offering a simplified setup, air tents are typically heavier and have a larger packed size than poled tents. They also require a pump, which is an extra piece of equipment to carry.
Shop Air Tents from Outdoor Action
Air tents provide a quick and convenient way to set up camp, making them a suitable choice for those who prioritise speed and ease of use. While they are heavier than pole tents and require a pump, their stability and simplified setup process make them a popular choice for families and campers who frequently move between locations. The best choice depends on your specific needs, whether that is the simplicity of an air tent or the lightweight nature of a pole tent.
Our selection of air tents comes from top brands like Outwell and Vango, so you can invest in reliable tents.
Related
Tent Setup & Pitching (General): Master the Art of Your Campsite Home
Tent Accessories & Usage: Enhancing Your Camping Comfort and Convenience
Comments are closed here.